In List, you can define a list or group of elements for easy selection of multiple elements when defining a query within Discover.
For instance, you may want to build a set of queries to investigate sales across various regions. In such a scenario, rather than separately selecting each European office, you can simply configure a list containing the European offices. Then you'll select the list when building queries about the European offices in Discover.
In the long run, building lists can save users a lot of time when they need to include multiple elements within a query.
Custom Lists are not to be confused with the List Builder tool, although the List Builder wizard can be used to assist in building your custom list.
 Watch this video on how to build a Custom List
Walkthrough: Build a List
Follow this example to filter and sort a custom list. We will create a list of the top 25 products by net profit, excluding mountain frames, and sorted in descending order.
Use the SampleDemo data model In-Memory DB to follow this example.
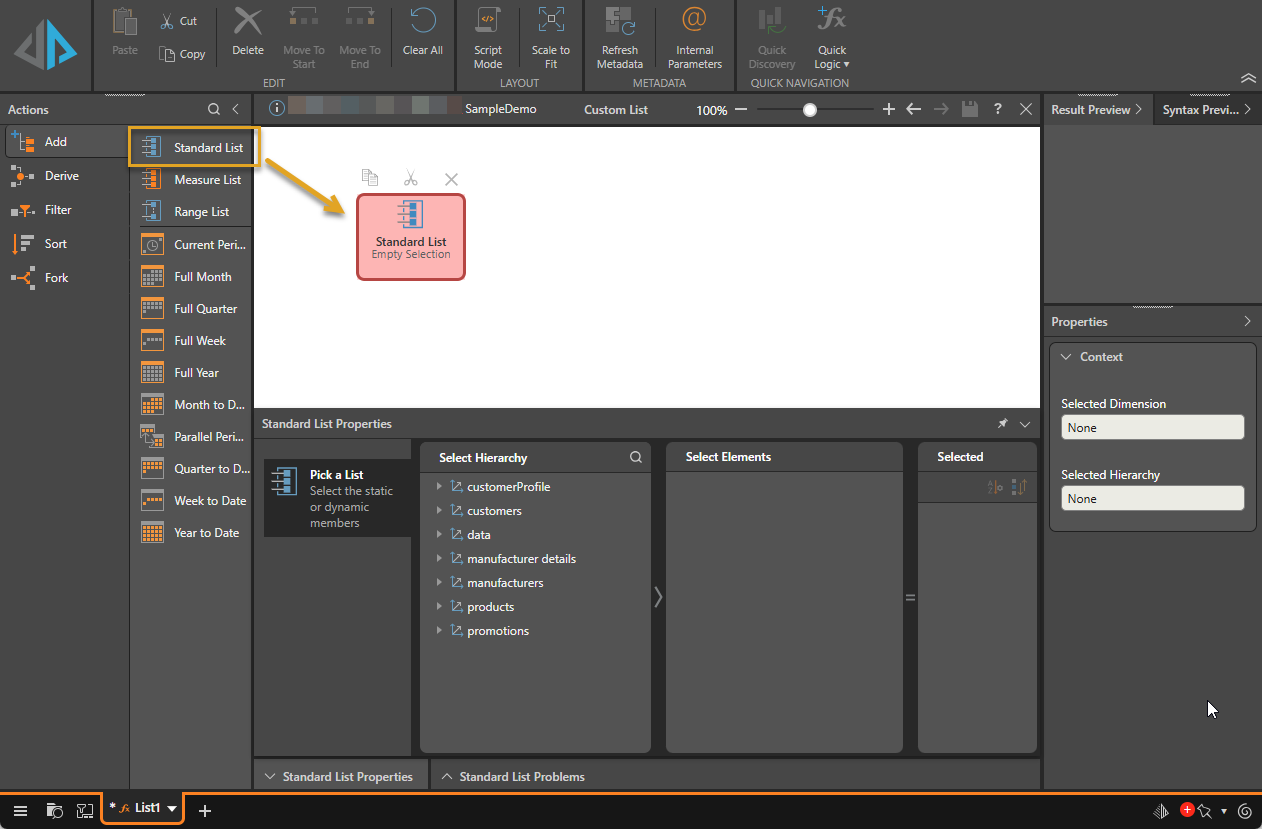
Step 1: Create the Initial List
From the Actions panel, under Add do one of the following:
- Double-click the Standard List block.
- Drag the Standard List block onto the canvas.
The block is added to the canvas and the Properties panel opens along the bottom of the canvas.
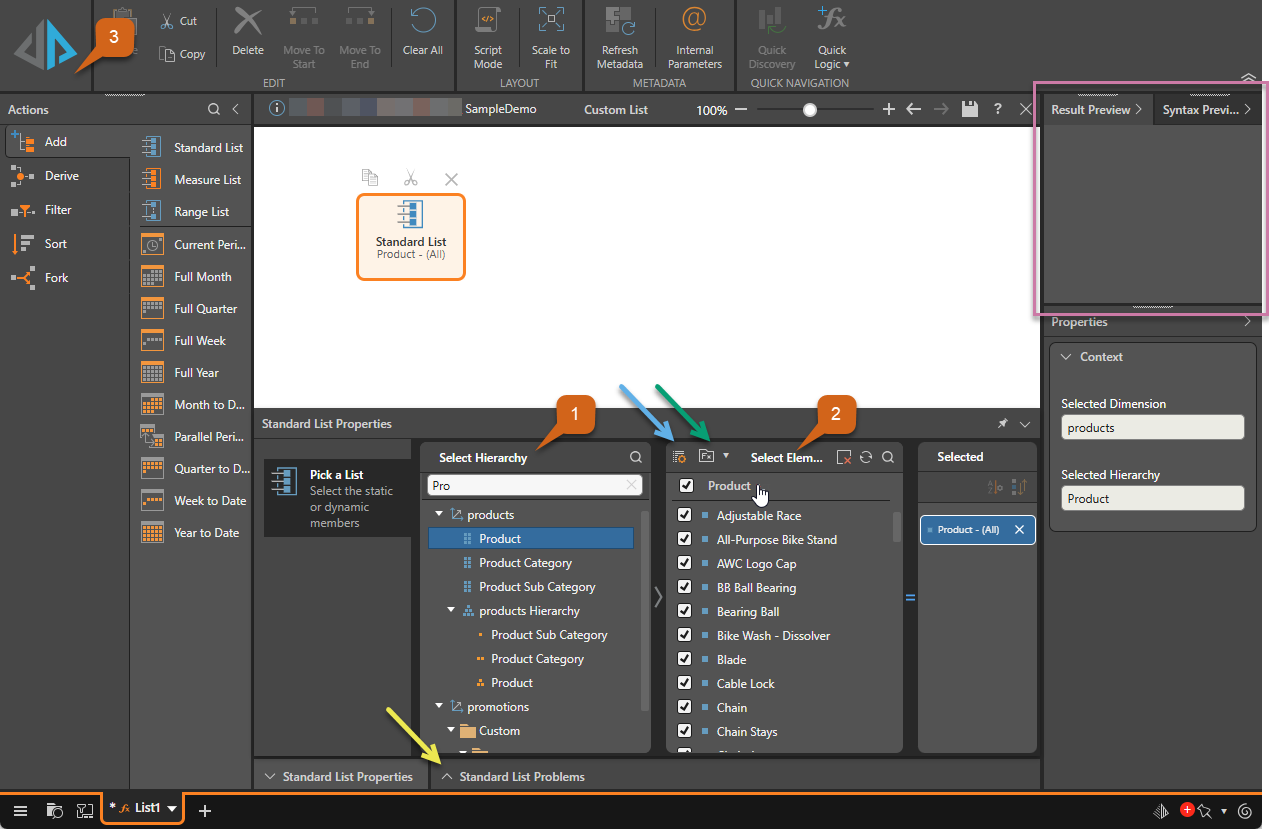
Step 2: Configure the List to include all Products
With the List block selected on the canvas:
- From the Select Hierarchy panel, open the Products dimension and select the Product hierarchy.
- From the Select Elements panel, select the checkbox in the Product header to select the entire hierarchy.
- Click Run to test the function:
- If the function succeeds, the products list will appear in the Result Preview panel and the function's syntax will appear in the Syntax Preview panel (purple highlight).
- If the function fails, open the Problems panel (yellow arrow) to find out why.
All elements associated with the product hierarchy are shown in the Select Elements panel.
The selected elements are shown in the Selected panel.
Tip: Users can also select elements using the List Builder (blue arrow below) or existing custom logic (green arrow)
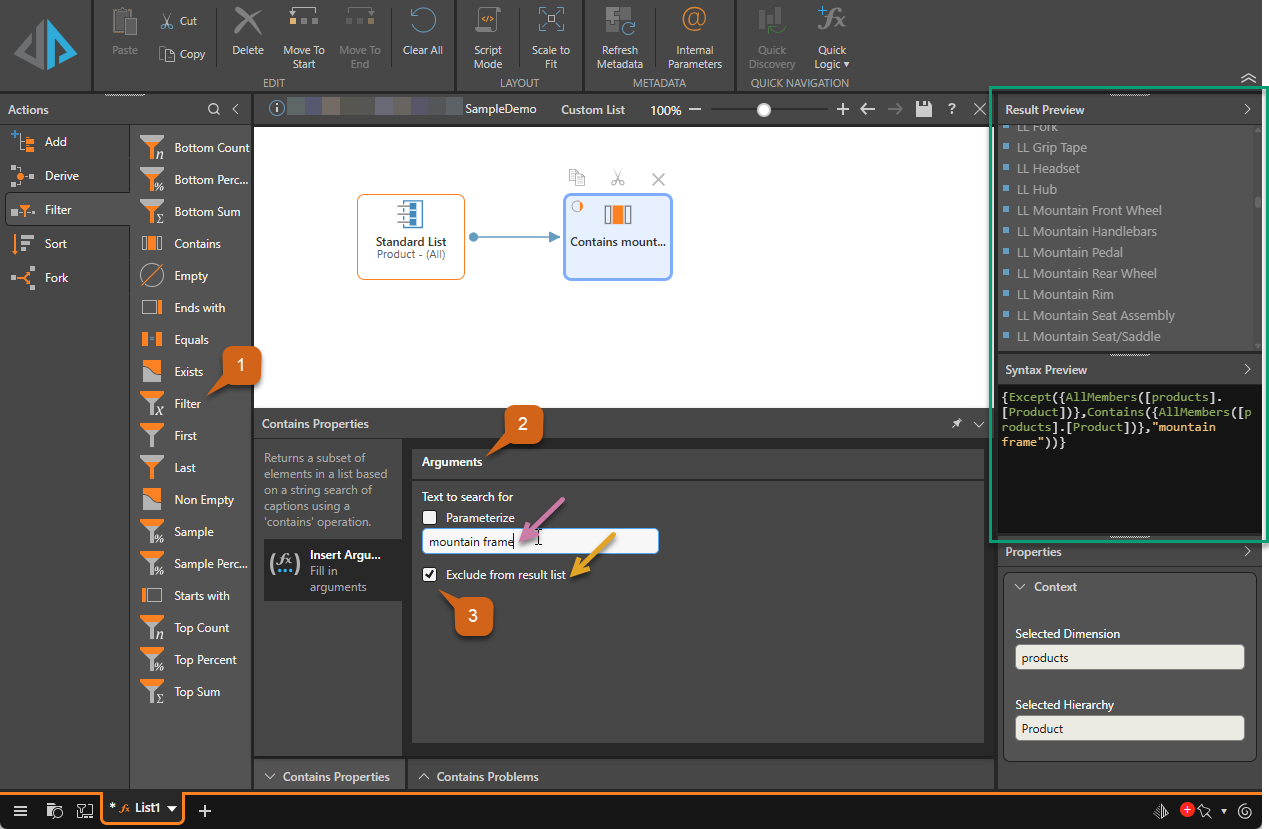
Step 3: Remove Products Named "Mountain Frame"
From the Actions panel:
- From the Filter actions, drag and drop the Contains block onto the canvas.
- From the Insert Arguments panel, enter the search string "mountain frame" (orange arrow below).
- In this example, we want to remove all the mountain frames from the list, so select the Exclude from result list checkbox (purple arrow).
The Contains block connects to the List block automatically.
This will return a list of products containing the search string "mountain frame."
This returns a list of all elements from the Product hierarchy, excluding those elements containing the string "mountain frame" (green highlight).
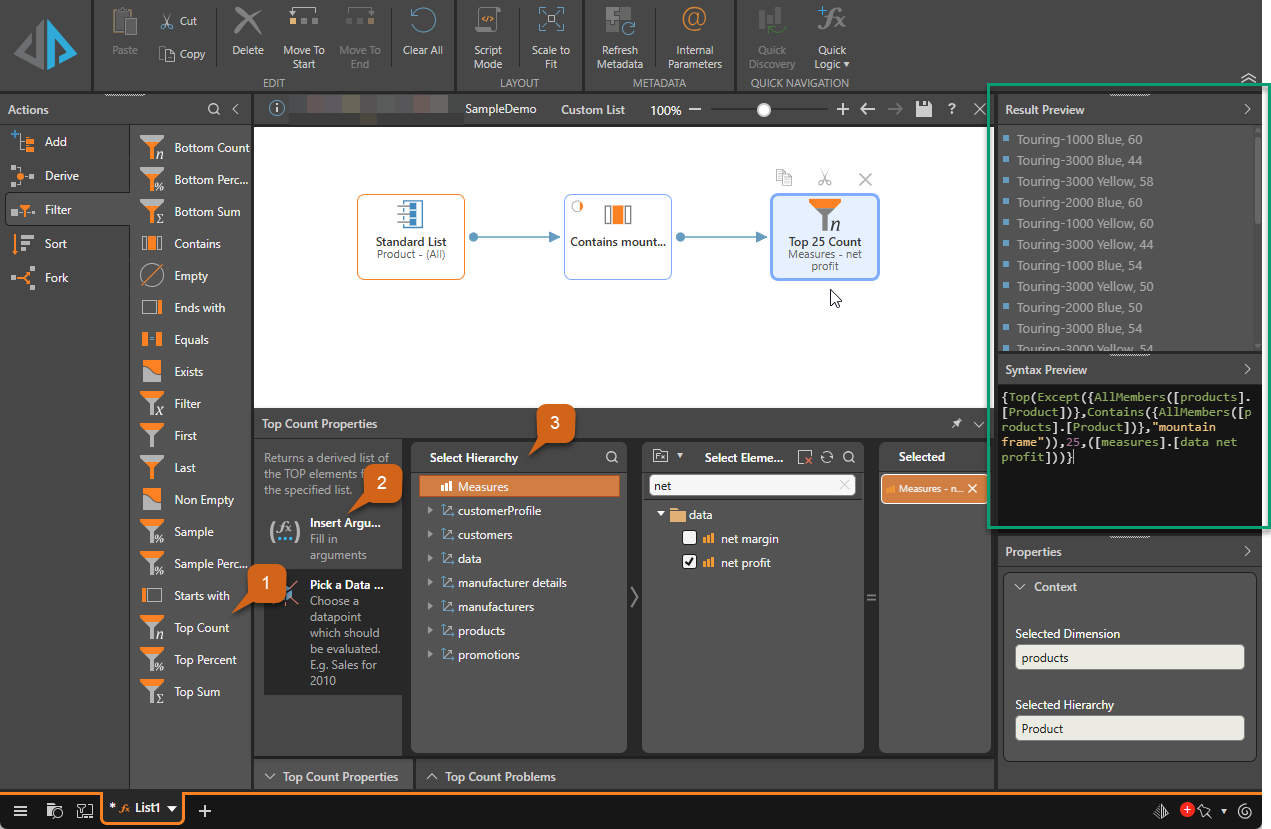
Step 4: Return Top 25 Products
From the Actions panel:
- From the Filter actions, drag and drop the Top Count block onto the canvas.
- From the Insert Arguments panel, set the number of items to 25 (Fixed value).
- Click Pick a Data Point and select the net profit measure.
Again, the blocks connect automatically.
This will return a list of the top 25 products.
This will return a list of the top 25 products by net profit.
Note: This list also excludes elements containing the string "mountain frame" as defined in the previous step (green highlight).
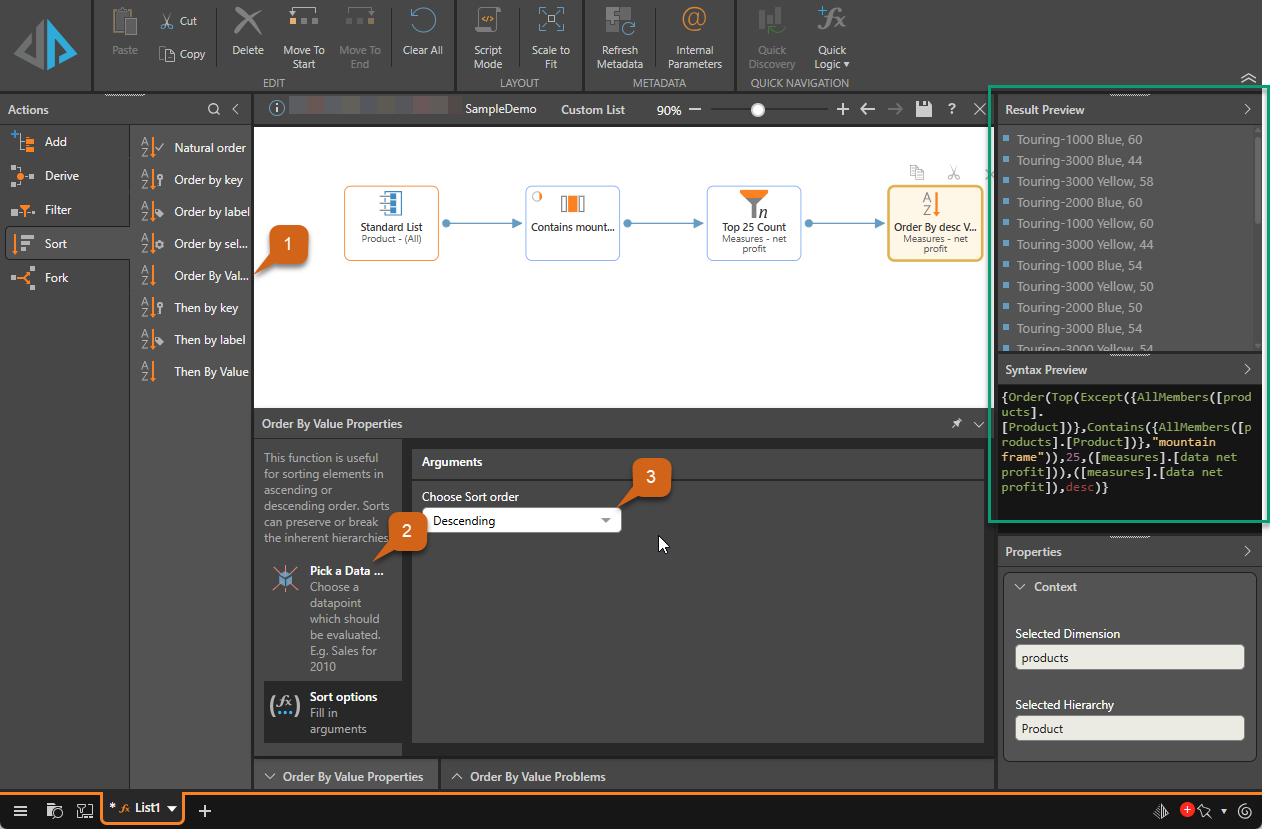
Step 5: Sort the Results in Descending Order
From the Actions panel:
- From the Sort actions, drag and drop the Order by Value block onto the canvas.
- From the Pick a Data Point panel, select net profit as the data point.
- Click the Sort Options panel, change the sort order to Descending
This will sort the list by net profit.
This will sort the list in descending order by net profit.
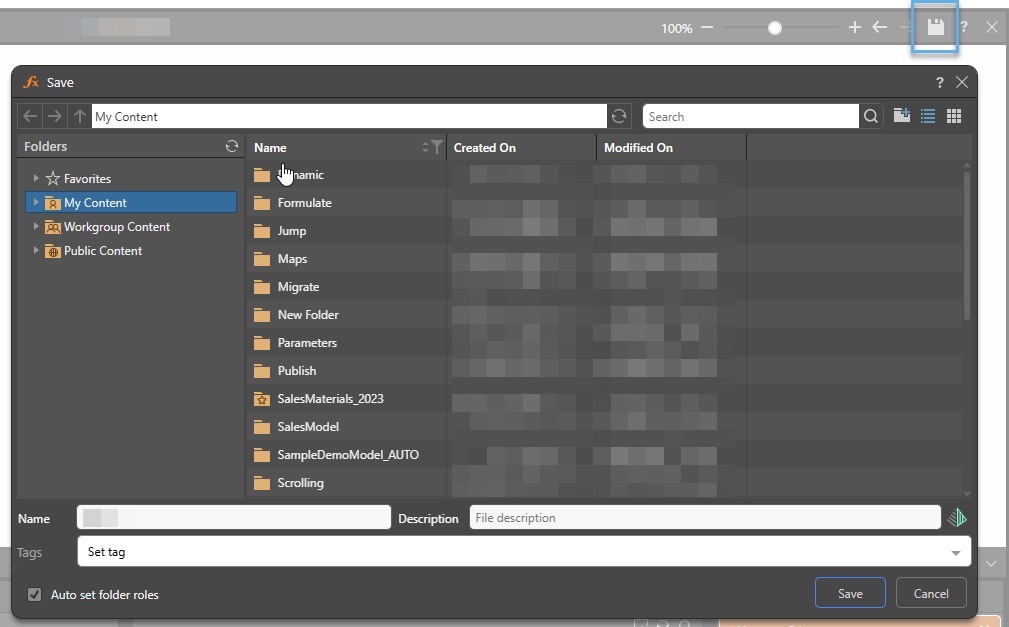
Step 6: Save your Custom List
Save your custom list.
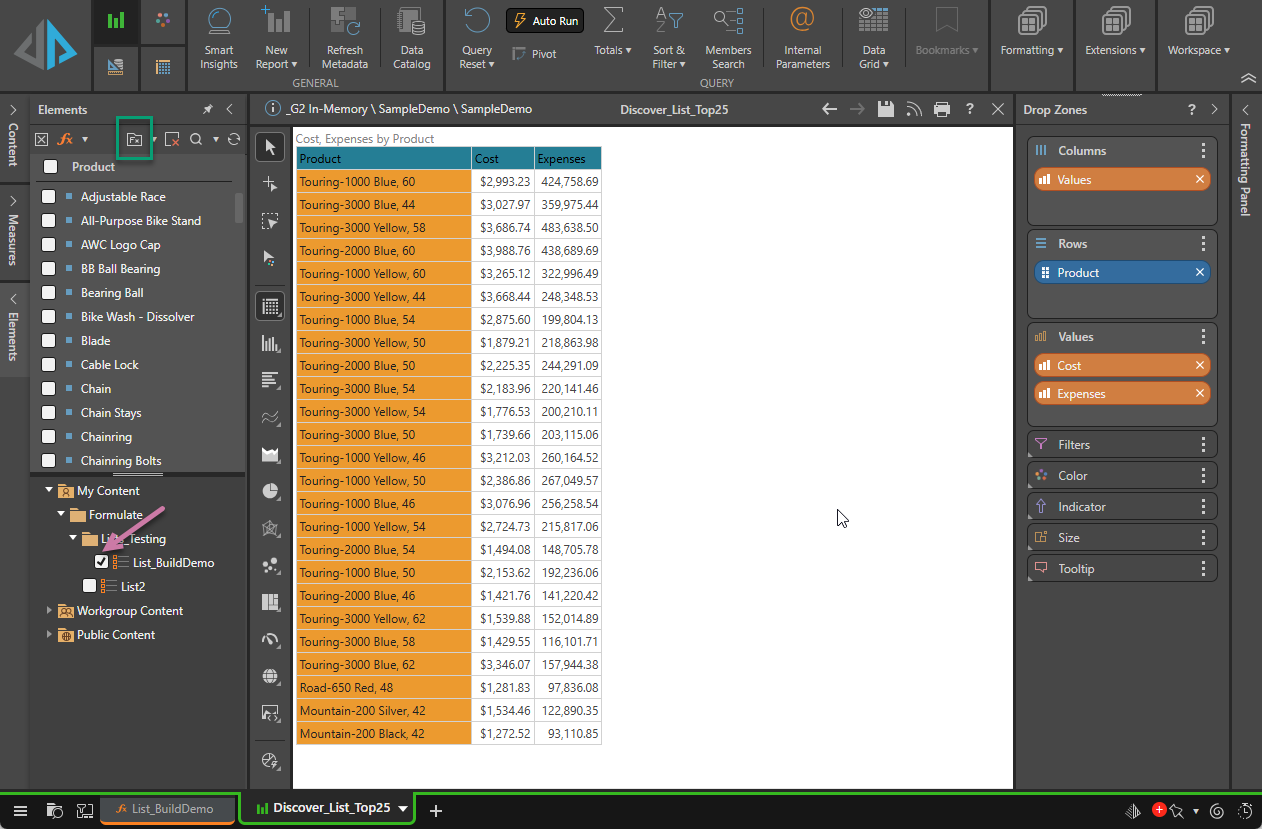
Step 7: Use the List in a Discovery
Click the Quick Discovery button (red highlight) to immediately open the custom list in a new discovery.

You can also add the list to a discovery later on by opening the Product hierarchy's custom logic from its Elements panel (green highlight), and adding the list to the drop zones (purple arrow).